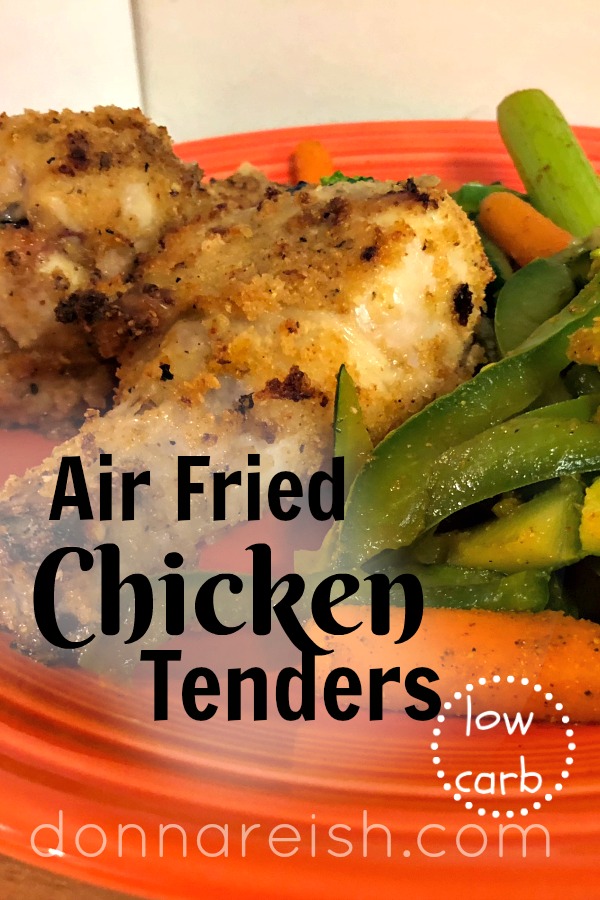
Two of the most common praises you hear for the air fryer are chicken (tenders, nuggets, wings, thighs, breasts–you name it!) and French fries (or potato wedges–really any “fried” potato)–and with good reason! These two, formerly-forbidden-to-many, “fried” foods are absolutely amazing in the air fryer. I love popping French fries, mozzarella sticks, and chicken tenders in my fryer for my sons when they stop by–yes, all “premade” and found in the freezer section of the grocery! See my original Air Fryer Tips and Croutons here!
However, I prefer to cook more healthfully for Hubby and me–and that doesn’t include frozen appetizers as our regular fare. If you’ve read this blog long, you know that I love creating low carb recipes out of formerly-high-carb-original recipes and ideas. I do this in this recipe with my Low Carb Breading Mix (which doesn’t have to be low carb–the teacher in me loves giving options and alternatives for families–so check out this convenient breading mix!).
Soak in buttermilk for 30 minutes to several hours. May also use half and half or cream with a tablespoon of vinegar to “make” buttermilk.

With this Breading Mix, you can alter it however–or use all panko and seasoning mix for a quick, family-friendly breading. You can do as the recipe below suggests–and use it with a simple buttermilk marinade or double or triple dip in eggs and breading for a thicker coating that stays put. (One beauty of the air fryer is that the breading does stay on things well since they’re not floating around, dropping off pieces of breading.)
Place them in air fryer one level deep. Do not overlap or layer.

This recipe is a lightly-breaded chicken, which we like. Feel free to double dip!
(Also note that the more low carb ingredients you use, such as Parmesan and ground pork rinds, the less “crusty” your chicken will be. It’s the flour, panko, bread crumbs, cracker crumbs, etc., that make crispier, crustier outsides!)
Check for doneness with a meat thermometer pushed into two pieces of chicken.

Use a meat thermometer! I am a fanatic about meat thermometers. So much so that I usually put one or two in our Plastic Wrap Gift Ball that we do with our grown kids every year. I figure you can never have too many meat thermometers. (Plus, I’m hoping that one of them will actually start using it!)
Below are links to the ingredients and items I use in this recipe. I am an affiliate for Amazon.com. If you click on the links below I will earn a small commission. Thank you for your support of this blog!
Put crumbs in shallow dish a half a cup at a time, so you don’t waste any—and crumbs will not get so gunky from the buttermilk.

You can’t be too careful with the doneness of chicken. Period. So here are my meat thermometer tips for this recipe:
1) When you think your chicken is done, don’t trust the “look” or “feel” of it. Use the thermometer!
2) Put a little temperature chart on your fridge or inside one of your cabinets to refer to. (I have a meat thermometer that is not digital but tells the range of the temperature (i.e. rare beef, well done beef, etc.). While I like having the easy reference, I think a digital one would be better–I can always check a chart quickly if I forgot the range for a certain doneness.)
Check out this handy chart from Campfire Chili:

3) When testing for doneness of small pieces or thinner pieces of meat, follow these steps:
a. Place two pieces on top of each other. (One thin piece of meat may not give you an accurate reading.)
b. Place the meat thermometer in the flesh of the meat through both pieces.
c. Do not put the thermometer against the bone.
d. Stop the thermometer before it goes all the way through the meat. You want the temperature of the meat–not the bottom of the fryer basket. This will give a false reading.
Perfect chicken drumsticks! Light but super tasty breading!

So this recipe/process can be used with nuggets or tenders (skinless, boneless) as well. Here’s how:
Air Fryer Chicken Tenders or Nuggets
Follow recipe as given below using 1 1/2 lbs chicken tenders or nuggets instead of drumsticks. Cook for 12-18 minutes at 400 degrees. Turn gently half-way through.
And….you can also “oven fry” this in an oven–though you might want to brush on some extra butter mid-way through to help with the crispiness.
Final note: If you are seriously trying to perfect your breading and air frying techniques, consider getting silicone or rubber tipped tongs. They are way gentler on breaded foods, and the breading truly does stay on better than with metal ones. Regardless, be gentle in the transferring and turning if you want to preserve your breading!
- 6 chicken drumsticks (1 to 1½ lbs)
- ½ cup buttermilk (or half n half or cream mixed with 1 TBSP vinegar)
- 1 cup Breading Mix* {or ½ cup Breading Mix and ½ cup grated Parmesan}* (or half panko and half flour)
- 3 TBSP butter, ghee, or oil
- Place the chicken drumsticks with the skin on in a plastic bag and pour the buttermilk into the bag. Let marinate in the refrigerator for between 30 minutes and several hours.
- Place Breading Mix in shallow pan, such as a pie pan.
- Remove the chicken from the buttermilk, shake off excess buttermilk, and dredge the drumsticks in the Breading Mix to coat on all sides. (Double-dredge if you like a medium amount of coating.)
- Put the chicken drumsticks in the Air Fryer basket and air fry for 10 minutes.
- Pause the Air Fryer and brush drumsticks with melted butter on both sides.
- Turn the chicken over, lower the temperature to 300°F (150°C) and air fry for 10-15 more minutes or until internal temperature reads 165°F (79°C).
- Remove from Air Fryer and let the drumsticks rest for 5 minutes before serving.
- To bake: Bake in cookie sheet with sides, lined with parchment, uncovered at 350' for 45-55 minutes convection; 55-65 minutes regular.


